
Blog
Aug 25th, 2012
Lightroom Collections
Sorry, I have been a bit quiet for a while - only just got back from a quick visit to the UK late last night. I didn't even take a camera, they seem to have eaten all the wild animals over there, at least those of any size! However, I did find time to write another Blog, so here is one on how Lightroom makes organizing your images so very easy.
Lightroom ‘Collections’ are fabulous! Use them like virtual storage bins, job folders or as easily created photo albums that you can store, modify and share. They are also useful for printing, for uploading to web galleries, for slide shows or for exporting. You can also create sub-collections within a collection set. It is a great way to organize your images, and the advantage of having collections is that images are not moved out of the folder in which they exist, you are just creating a reference in the metadata that points to those files.
There are three types of collection:
Quick Collection
Regular Collections
Smart Collections
A Quick Collection or a Regular Collection can be set to be the Target Collection, but you may only designate one collection at a time as the target. To designate a Target Collection, select the required Collection folder and then Right Click (Control-Click) it, and choose ‘Set As Target’.
If you have not selected another Collection folder as the Target, Quick Collection is set as the default collection.
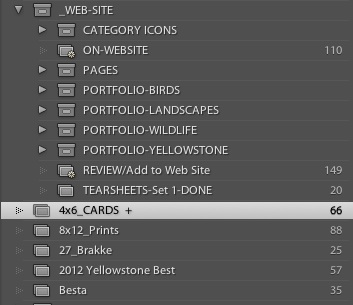
When you have set a collection as the Target, you can then use the shortcut ‘B’ key. Hitting the ‘B’ key while you have a single image or multiple images selected will automatically add them to the collection. Hit the 'B' key again to remove images from the collection. If you wish to add images to a collection that you have not set as the Target, simply drag the images manually into that collection. The ‘+’ to the right of the collection entitled ‘4x6_CARDS’ designates that it has been set as the ‘Target’:
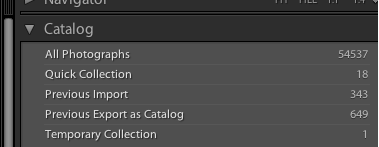
Quick Collection is found in Catalog at the top left-hand side of the Library Module, and is used to collect a temporary group of images to work on. You can only have one Quick Collection at a time. Use it to export, print, compose slideshows etc, and then, if you wish, convert it to a permanent collection by right clicking or choosing File<Save Quick Collection.
For example, perhaps you want to perform a search using keywords and ratings for images you want to show for critique at your next workshop. As you browse through folders and searches you add each potential image to the Quick Collection by hitting the ‘B’ key. When you have finished searching, you can edit the collection and remove some images. Finally, when you have made your selection you can save the Quick Collection as a permanent Collection called Critique. Whenever I conduct a meaningful search I usually turn it into a collection, you never know when you might need the same group again!
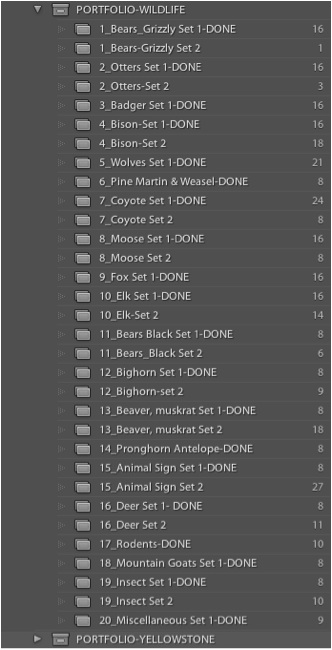
Regular Collections are created by hitting the ‘+’ next to ‘Collections’ followed by ‘Create Collection’, and are manually compiled by dragging images into it or by using the shortcut ‘B’ key. Here is what is so awesome about the power of Lightroom – I have a collection called Yellowstone Portfolio and have placed 62 images into that collection. Many of these same images are also in collections titled Stock, Gallery, WebSite and Best of the Year. With Lightroom, the master digital negative remains in its original folder location. We do not need to duplicate the image or create a virtual image in order to place it in multiple collections. Instead, Lightroom creates a reference file that will go into one or as many collections as you designate.
When you view an image within a collection you will see the actual image and can make changes to that image which Lightroom updates back to the master file. This will then display the update in each collection of which the image is a part. No more having to duplicate files and then having to make changes to it in all the folders you had it in.
I use regular collections to keep track of which images are on my website, or have been submitted to magazines, or photo contests or slide shows I have given.
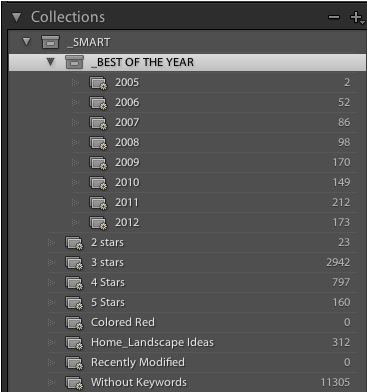
Smart Collections are cool! They are created by hitting the ‘+’ next to ‘Collections’ followed by ‘Create Smart Collection’, and are automated based on any criteria you select. They allow you to select from a large list of criteria to automatically group your images into specialist collections. I often use ratings plus labels, capture date or keywords to define images going into different collections. Since Smart Collections are generated automatically based on the criteria you defined them by, you cannot manually add or delete images from a Smart Collection, nor can you designate them as a Target Collection. If you wish to delete an image from a Smart Collection then you need to edit the image’s metadata so it no longer fits the criteria and then it will automatically disappear from the collection.
I use Smart Collections to keep track of which images I need to review to see if I want to add them to the website (Blue Label). I have “Best of the Year” collections that are my 4 star or greater taken in a specific calendar year. The options are as limitless as the metadata.
Here is a link to Adobe for additional information on working with collections.
OK - START COLLECTING!
Lightroom 4 ~ Develop Module ~ Hints Part 2
Summer
Recent Entries
- Not Just Jaguars: A Pantanal Wildlife Photography Workshop Through Wild Brazil
- Wild Alaska by Private Yacht: Why This Katmai Photo Workshop Is Different
- Clear Views, Clean Angles: Why Vehicle Space Matters on a Botswana Photo Safari
- How to become a better wildlife photographer in your own back yard.
- Five Reasons Why I Shoot in Manual Exposure Mode
- Capturing Winter Wonder: Photographing Yellowstone’s Winter Wildlife
- The Artist’s Eye
- Icy Dispatch
- Blogging the Blog - National Wildlife Week
- Bison Behavior and Survival
- Winter Highlights Report
- Coyote Climbs Tree and Steals Bobcat’s Duck!